One of the decisions we made for our van was to go with a composting toilet to remove the need for a black water tank. We weren’t excited about the prospect of needing to empty a black tank frequently as well as the extra weight and space needed for another tank. We’ve been very happy with our composting toilet. We have to empty the liquid container every 1-3 days with regular use (depending on hydration and location) and the solid bin every 3 weeks to 2 months, for full time use (only using the composting toilet) to intermittent use (using some public bathrooms).
Part List:
Nature’s Head Composting Toilet (Buy on Amazon)
Cellular PVC Trim (Buy at home improvement store)
Extreme Outdoor Industrial Strength Velcro (Buy on Amazon)
Dual Sided Velcro Tape (Buy on Amazon)
Camco Vent Kit (Buy on Amazon)
Butyl Tape (Buy on Amazon)
Silicon Caulk (Buy on Amazon)
Dicor Self Leveling Lap Sealant (Buy on Amazon)
1 1/4” PVC End Cap (Buy at home improvement store)
1 1/4” PVC Elbow (Buy at home improvement store)
Composting medium options we have used:
Coconut Coir (Buy on Amazon or at a local nursery)
Peat Moss (Buy at a local nursery / home improvement store)
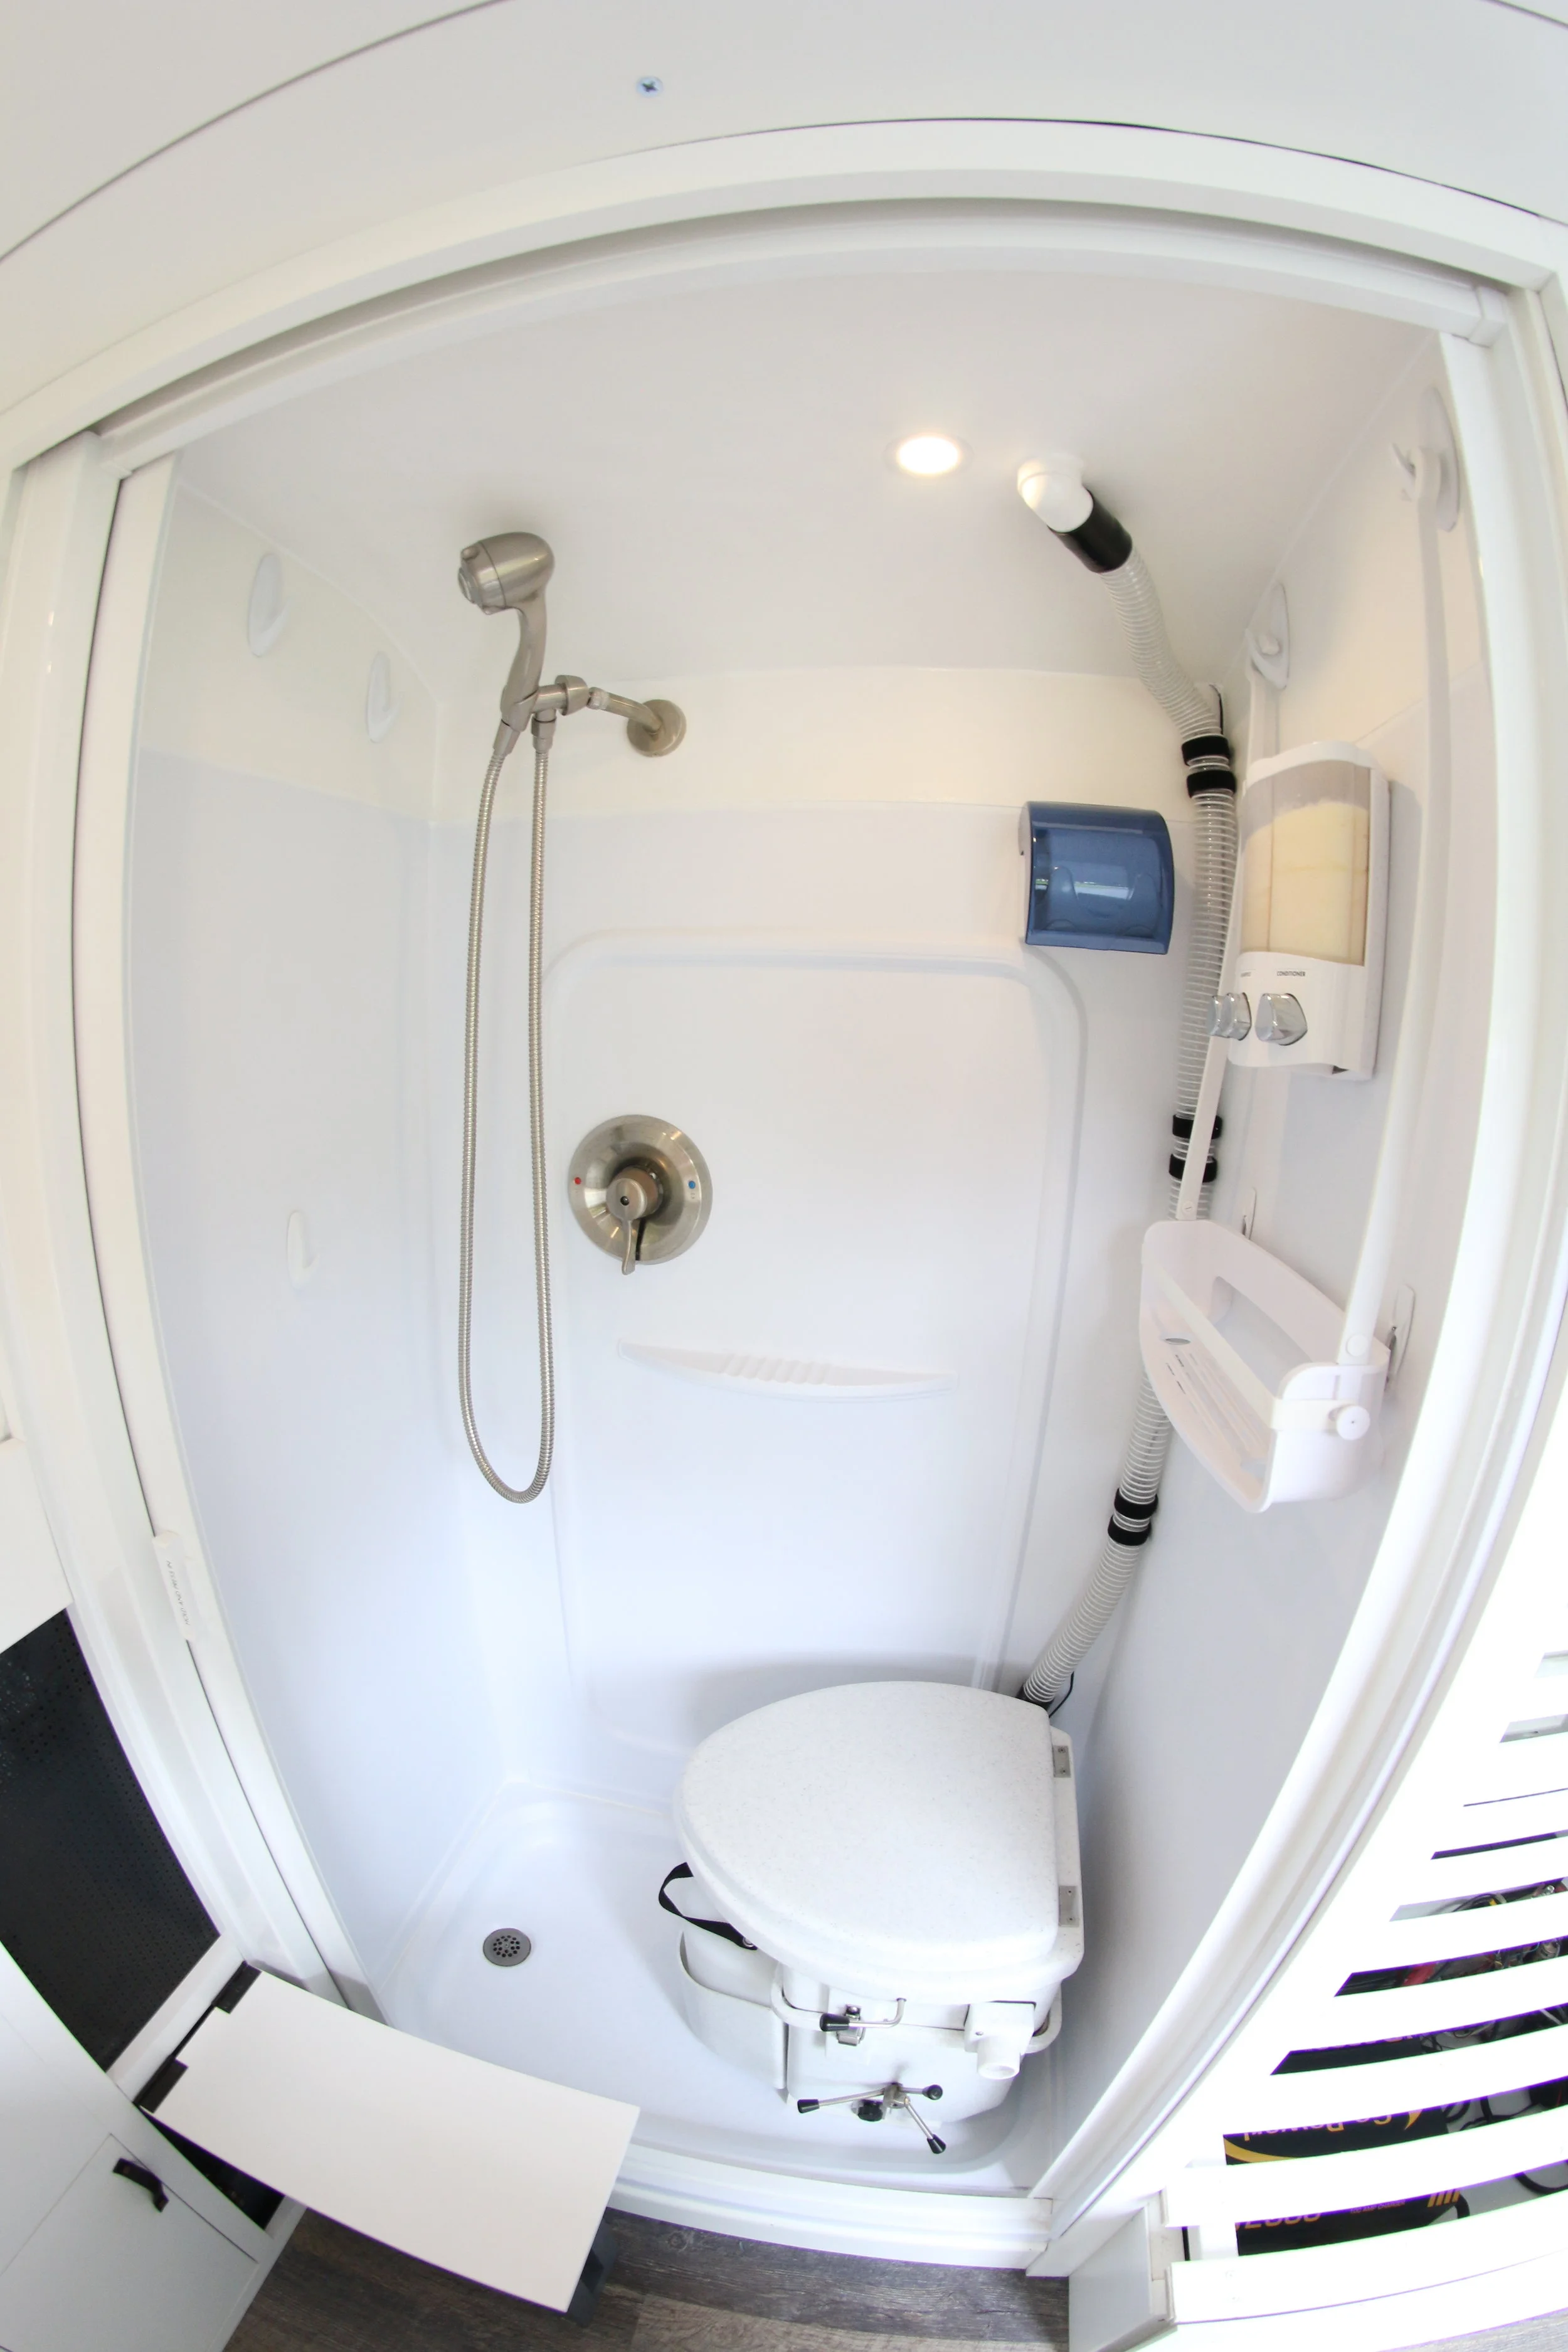
We installed the composting toilet in our shower. We wanted to avoid drilling holes in the shower pan base so we fabricated supports for underneath the toilet that attach to the floor using industrial strength Velcro. We used PVC cellular trim because it cuts and can be screwed into like wood but it won’t degrade like wood in a wet shower.

We cut the trim to size, drilled pilot holes, and screwed in the provided Nature’s Head angle brackets that secure the toilet. We sealed the screws with silicon for extra protection against water seeping in to any cracks and causing mold.

The angle brackets are attached to the PVC supports and the feet are ready to be mounted in the shower.
We attached the PVC supports to the floor using industrial strength velcro. They have held up well and keep the toilet securely attached to the shower pan. If I did it again, I would extend the PVC supports a bit further because there is a bit of wobbly movement of the toilet due to the fact that the front sticks out over the end of the supports, but the toilet has never come loose.
Dry fitting the toilet before attaching the industrial strength velcro.
We drilled a hole through the roof of the shower and van to allow the exhaust hose to exit to a standard RV vent. By using butyl tape between the van roof and the Nature’s Head exhaust hose flange, and again between the exhaust hose flange and the RV vent, we prevented any water from seeping through. The RV vent base is slightly larger than the exhaust hose flange so by screwing the RV vent into the roof through the butyl tape, it held the exhaust hose flange in place.
The RV vent was sealed using Dicor Self Leveling Lap Sealant and all exposed butyl tape was covered. We added a bug screen below the cap of the exhaust port and secured it using a hot glue gun (although many other ways could be used to secure the screen it). We wanted to make sure nothing was getting in.
Inside the van, we used PVC elbows to attach the exhaust hose to the flange in the roof and to the exhaust hose port on the toilet. PVC elbows are not necessary but they made the hose fit better and stay out of the way in our installation.
When we shower we put a PVC end cap over the air intake fan to avoid pulling moist air into the toilet. Before we added this to our routine, we didn’t have any issues but it seems like a decent idea to keep the compost medium dry.

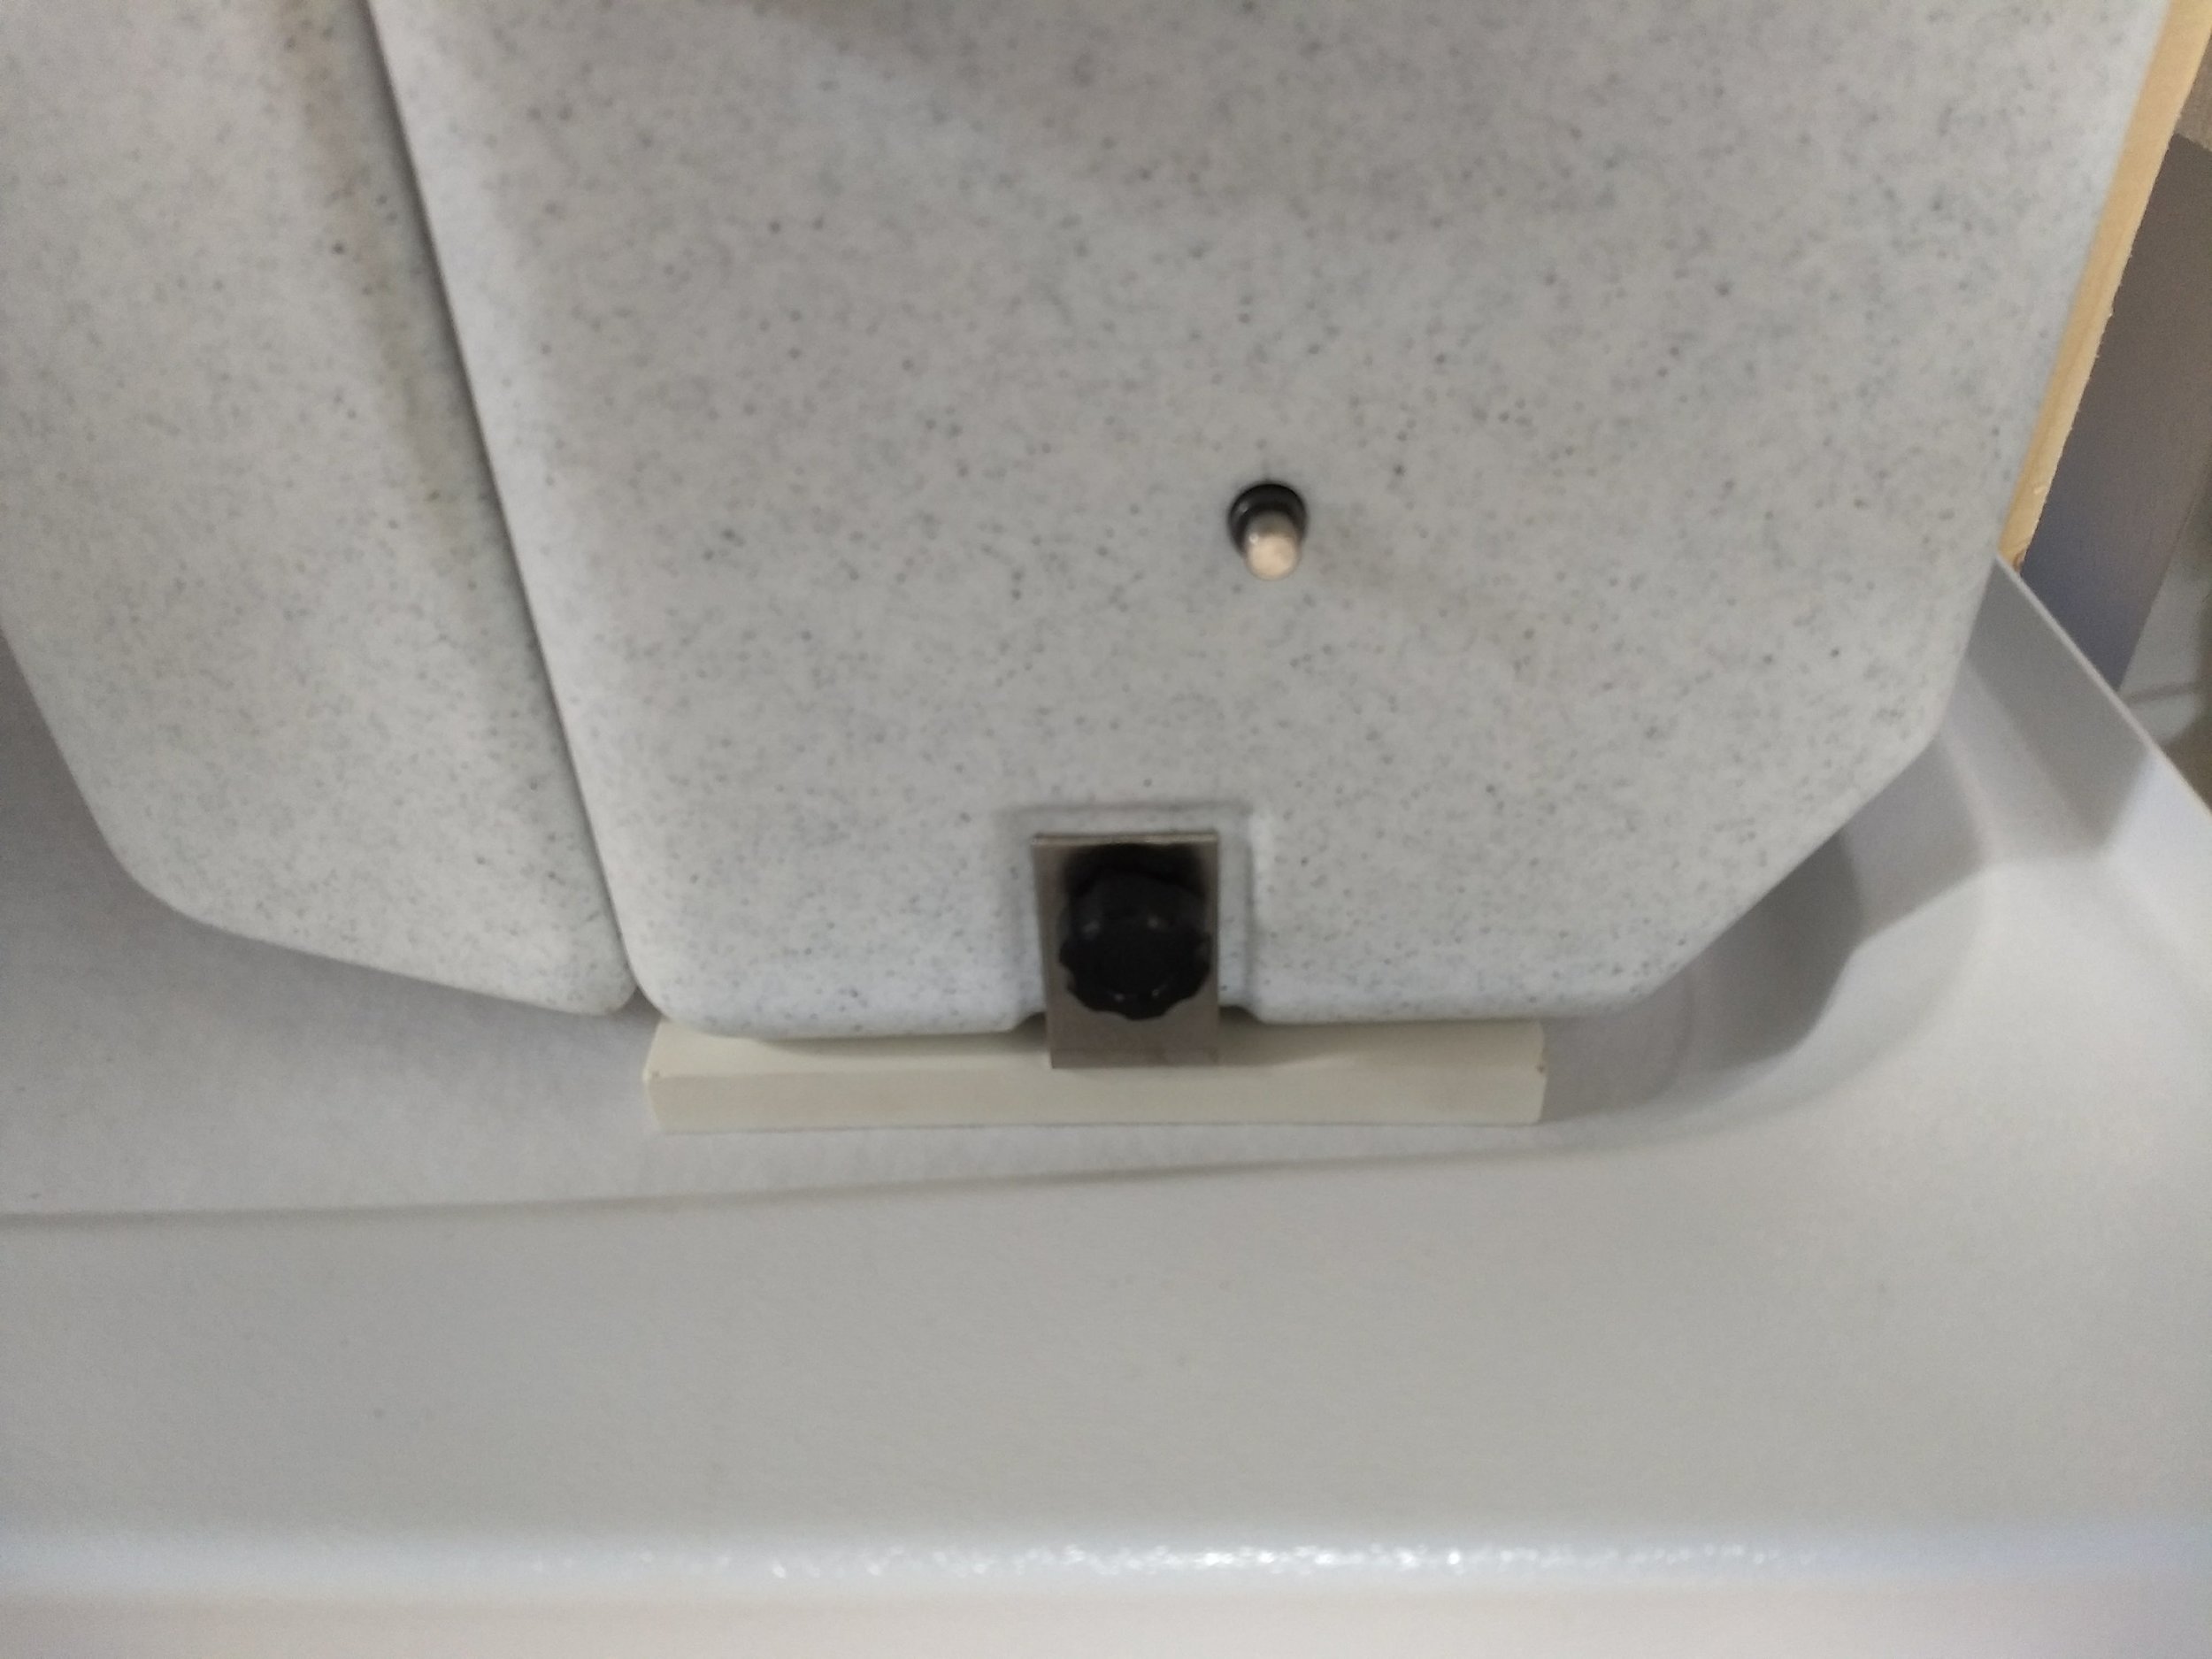
We added a bug screen to the vent. You can see the Nature’s Head provided flange behind the bug screen. The flange sits on top of the roof with the 1 1/4” tube sticking inside the van.

More Dicor Self Leveling Sealant was added after this photo to cover up all of the butyl tape.
Some frequently asked questions:
Where do you dump the liquid container?
Public bathrooms or pit toilets (it has a cap and can be placed in a bag to not draw attention).
The middle of nowhere when dispersed camping. We sometimes scatter it around plants, well away from trails, campsites, water sources, etc.
The grey tank. We can dump it down the shower drain and store it in the grey tank, until we go to a dump station. We prefer to avoid this as it smells up the van while you are pouring it, though it goes away quickly if you run some water down the drain.
Where and how do you dump the solid container?
We usually change the composting medium when dispersed camping to avoid stares, but we have also done it in a Home Depot parking lot (see below). We almost always dump the used medium in a trash bag and throw it out, as the composting hasn’t finished. Biodegradable bags would be best to use if you throw it out. We have also dug a very deep (2 feet) cat hole one or two times in very remote areas and buried the waste. I wouldn’t recommend this strategy except in very rare situations where its unlikely anyone would find or disturb your cat hole. If you have a place to store compost you could dump the compost and allow it to further break down before using it on plants (not recommended for vegetables of fruits that humans may eat).

One of our first composting medium changes - hidden in the corner of a Home Depot parking lot
What composting medium do you use?
We first used peat moss for about a year and were happy with it. We had no issues with bugs, but weren’t happy with the amount of space that the peat moss took up in the garage and that we could only buy very large bags. We have read that people have had issues with bugs in peat moss, but we had no issues in a year of use.
We tried coconut coir as it is a lot more compact in packaging but it needs to be hydrated before use. We place it in a garbage bag or bucket and add water until it has the desired consistency. The first time we tried using coconut coir we tried hydrating it in the toilet and that was a terrible idea. It almost made us swear off coconut coir as a medium and return to peat moss. Pre-mixing in a bag or bucket is the way to go. It is a lot smaller to store, but does take a lot longer to prep when you want to change the compost medium. I’ve read that coconut coir does not have the same potential issues with bugs as peat moss, but we actually had bugs one time with our coconut coir. We purchased moth balls and placed them inside the toilet, which resolved our issues fairly quickly.
Does it smell?
No it really doesn’t. Even changing the composting medium just smells like dirt, not poop.
Pouring the liquid container out does smell like pee, but the inside of the van doesn’t smell like pee. We spray a bit of vinegar after each pee which helps cut any potential smells and keep the toilet clean.
The exhaust fan for the toilet helps to remove any smells from the van.
Are you happy with your choice?
Absolutely. I think composting toilets are a bit overpriced, but we love our decision to go with one of them. Maybe next time I would build my own custom design but I’d take it over a black tank any day.